What Did You Do? Wednesdays

Calling all fall fanatics, adventurous organizers, exercise procrastinators, perfectionists unable to make a move unless they're certain it will turn out with ultimate precision, messy Marvins, and any other category you put yourself in ~ stop by each Wednesday and share what you did that week. Big things, little things, adventurous things, nothin' much things, somethin' special things....doesn't matter.

Share your just one thing on What Did You Do? Wednesdays!


Thursday, April 29, 2010

Diapers to Pull-Up Undies Tutorial

A couple of months ago when my daughter was still potty training, we had a whole stack of diapers which were fine for the nighttime, but during the day they just weren't convenient. Our supply of the pull-up variety was coming to an end, yet I couldn't see buying more when we had so many regular diapers left. Enter my diaper to pull-ups conversion. It goes something like this:

All you'll need is a pair of diapers, a sewing machine, regular thread and elastic thread.

First, put the diaper on your child and mark where the tabs come together so that when you take them off and sew them, you'll know the proper size of the undies-to-be.

See this white tab right here?


This is the one with the stretch to it. We want to keep this and we'll sew along the side of it.  (I've showed you the right tab here, but in the next picture I'm actually sewing the left first...sorry about that.)


Leave your tab attached in the spot that you fastened it when you fit your child in the diaper.  All you're going to do is sew the actual tab section to the diaper.

When you sew it, you will want to use elastic thread in the bobbin.  Hand-wind your bobbin with elastic thread, place it in the machine like normal, and you're set to make a pair of training underwear.  Make sure to back stitch as well.


Jumping ahead just a bit, I want you to see how it will look on the outside when you have it sewn up.


Now let's go back.  When you flip it to the inside, sew along this portion of the diaper.  If it starts to get confusing over what part goes where, just look at the front again and remember all you really need to do is sew the tab down and allow the stretchy tab to do its job.


Here are the inside tabs that you won't need anymore. Actually, they'll just kind of get in the way, so you can snip them off.


The final product is here. You can see that they don't have to be perfect. Again, the main point is that you stitch that outside tab down and allow the stretchy flap to stretch as much as it can. By using the elastic bobbin thread, you've also established a little more "give".

Now your big boy or big girl is all ready for potty training and you just saved some money.

If, by chance, you STILL have diapers left over (various sizes are kind of good), they make wonderful hot and cold packs. Run HOT (but don't burn yourself!) or COLD water into the diaper just until they're saturated, but not too filled up. They're awesome because they hold the temperature quite a long while, don't leak, and don't cause your clothes to get wet. FYI: Nursing Moms, they are so great for blocked milk ducts!

__________________________________________________________________
Linked to:
It's a Hodgepodge Friday @ It's a Hodgepodge Life
Frugal Fridays @ lifeasmom.com
Check Me Out Saturdays @ A Vision To Remember
Saturday is Crafty Day @ Along For The Ride
Weekend Wrap-Up Party @ Tatertots and Jello
Sunday Showcase Party @ Under The Table And Dreaming
Making The World Cuter Monday @ Making The World Cuter
Made By You Mondays @ Skip To My Lou
Motivate Me Monday @ Keeping It Simple
Just Something I Whipped Up Monday @ The Girl Creative
Market Yourself Monday @ Sumo's Sweet Stuff

Friday, April 23, 2010

Puffy Flowers On-A-Stick Tutorial

So you've got your trusty "on-a-stick" standbys, right?  You've got your various meats on-a-stick like corn dogs and kabobs complete with veggies and fruit.  There's spun sugar on-a-stick (come on, let's give it up for my beloved Cotton Candy).  Surely any county fair across the good ol' USofA is bound to offer a whole host of disgusting, heart clogging "on-a-stick" varieties, but enter the Puffy Flowers on-a-Stick.  Fat free, calorie free, cholesterol free.  And considering the supplies, almost cost free.

It's a "WYSWYG" tutorial. You know, "what you see is what you get." Here we go!


Supplies: fabric, template/shape to trace around (or freehand cuts the mustard too), pen, 3/16 dowel, fiberfill, scissors/pinking shears


Jo-Ann's has a large selection of dowels, but any hardware store should as well. You can see the diameter and length of the ones I bought. For the vases I had, it worked perfectly to just saw them in half, but you'll be able to gauge what height will look best in your creation.


Trace around your template/shape. I added an extra inch all the way around just by eyeballing it.

Cut out 2 shapes for each flower (front and back).  I used a pinking shears to give it a little more character.

Place 2 pieces, wrong sides together and simply sew around the petals leaving about a 1/4" seam.  I used a sewing machine, but you could certainly do a running stitch by hand.  Leave a 1" hole in between 2 petals for stuffing.

Push fiberfill into each formed flower, using the dowel to distribute it into each petal.

Saw dowel to desired length and place it far enough in to establish stability.


You can hand sew this open part closed, but I actually didn't. The type and print of fabric I used was very forgiving.

You're done!

These are so fast and simple that I whipped them up Easter a.m. before company came. Thus, the Mod Podged (with pages from a book) eggs in the vases.

I got the set of vases for $8 at our Hospice Thrift Store, and the filler is a brown paper bag I ran through the shredder.

It would also look cute with double-sided scrapbook paper shredded in the vases, painted ping pong balls on top and colorful spring fabric flowers, don't you think?

___________________________________________________________
Party on!!


UndertheTableandDreaming
Funky Junk's Saturday Nite Special


Wednesday, April 14, 2010

WDYD? Wednesday - Blog Frog

Another week has rolled around, and I moved a couple of inches forward on the blog front. On Monday I attended my first of three photography classes. Am I going to "graduate" a seasoned, award-winning photographer? Nope. But I've already learned a couple of points, and I would imagine by the end I'll be able to actually understand all the verbiage in the instruction manual (when I'll have the time or the mindset to read that, well, that's another story). We've got a cute, little camera that actually has a whole host of features. It's my goal to learn what I can accomplish with it and greatly increase my skills.

I've also joined the BlogFrog. I had only recently heard about it myself. So if you are unfamiliar with it, here is the description from the BlogFrog web site:
BlogFrog makes blogs social through online community. This opens the conversation up between bloggers and readers and generates buzz, visibility and engaging conversations.

Although I am still working to fully set up my community, I would like it if you would join me because I have a lot of questions for you. I guess I decided to begin this additional piece of blogging once I learned I had 50+ more folks subscribing to my blog than I even knew!! (Thank you Google stats.) Heck, I thought I had a few friends taking a peek now and again, my dear Mother and two of her supportive co-workers reading my posts. So to the rest of you.....Hello and Welcome!! But more importantly, who are you?  Really ~ I want to know because I appreciate an audience.  My whole blog establishment comes from my desire to publish my life experiences (and oh boy, I've got 'em), a children's book (or 10), and some crazy and somewhat secret wish to be a stand-up comedian.  (Nice, stable life there, eh?)

My new BlogFrog widget is on the right column, labeled as such. I have displayed my first question. See that one, lonely, little question just sitting there all by itself with nary a response? I'd love some visitors. I wouldn't even feel the need to dust. And to all my other secret subscribers:  Hello?  Is this thing on?  Testing 1,2,3.  Testing 1,2.

What about you? How was your week? What did you do/accomplish/enjoy?

Thursday, April 8, 2010

Thai Stew

Last week I had some sort of "bug" that had me feeling pretty oogy.  I think my husband came down with it today.  So I wanted to make a warm-in-the-tummy something for tonight's dinner.  (*Side Note:  Exactly one week ago today we had 82 degree weather, and this morning it snowed.  Ha, ha, ha ~ Oh, that Mother Nature...isn't she just such a hoot?)

I had a chicken in the oven, and at 5:10pm I wondered, "Oh geez.... what am I going to do with that bird this time?"  (*Another side note:  Did you catch that "oh geez" bit?  Midwestern.  I've lived elsewhere.  I know that east coasters are not declaring "Oh geez."  But it's fun....just kind of sums it up sometimes.  Try it.  Say "Oh geez."  Very good.)

Back to my elegant fowl and the soul-warming stew that emerged.


THAI STEW (Remember, I don't measure, but I'll try to give some estimates this time.)

Extra virgin olive oil (about 2 tsp.)
Onion
Garlic
Red pepper

Chicken broth (about 1 cup)
Soy milk (about 1 cup)
Potatoes, cut into chunks (2-3)
Chicken and/or garbanzo beans
Canned tomatoes (1 can)

Basil (to taste...1/2 tsp.  You can always increase it to 1 tsp.)
Cilantro (to taste...1/2 tsp.  You can always increase it to 1 tsp.)
Black pepper (to taste)
Ginger (1/4 tsp.)
Lime juice (2 Tbsp.)
Soy sauce (2 Tbsp.) (I use Bragg Liquid Aminos....tastes the same yet good for you.  Go figure.)
Peanut butter (~3 Tbsp.)
Dark brown sugar (1-2 tsp.)
Coconut extract (1/4 tsp.)

I boiled the potatoes separately to speed things up until they were mostly done and then drained them.

Saute the onion, garlic & red pepper in olive oil.

Add chicken broth & soy milk (you can use evaporated milk if you prefer, but the unflavored soy was really good).

Add all of your seasonings and peanut butter.

Once the peanut butter is melted, add chicken and/or garbanzo beans and potatoes.  Heat thoroughly.

(Add extra love if you're serving someone who's under the weather.)

Wednesday, April 7, 2010

WDYD? Wednesday - Appreciating Others

Last Thursday here in Wisconsin we had record breaking temperatures.  It was spring break for my daughter, so when 82 degrees was in the forecast, I knew I had to blow off Easter preparations for the day and get outside with the girls.

I'm surprised I didn't see you there, because I think the whole rest of the world had the same thought I did and was also at the zoo.  But it was a good crowd, and although there was a mosh pit of kids in the play area, I saw a lot of parental supervision and general assistance among the adults.  You know how sometimes you attend kid events or visit a child play area and there's a sense of distance from the parents where you just have to wonder, "Who's watching these kids??"  I didn't feel that way at all last week.

I felt a kinship among the parents and grandparents who were there.  I had a very nice conversation with the mom in front of me while we were in line for the carousel.  I felt comfortable with her keeping an eye on my youngest for a couple of seconds while I made sure A. was settled on the animal of her choice around the other side of the carousel where I couldn't see her (grrr).  I spoke with a mom in the monkey house (there are days when that surely would have a double meaning) about her 3-year old daughter who was clinging to her and afraid to look at the apes about how I had the opposite problem with my two girls.  The conversation was short because I had to tackle my 2.5 year old as she tried to make her own way through the crowd.  (You see, I have these children that even as crawling infants were gone.  "Mom who?  I'm off!")  Later I coaxed her daughter down the slide from the top of a play structure with a long line behind us.  There was another mom who helped A. down from the climbing rocks while I was busy corralling M.

As we were heading over to the bears, A. was about 2 steps behind, but then not....   As I stopped to make sure she was still right by me, she ran about 5' to catch up with a desperate sound to her voice.  "Mom!  That little boy can't find his mom!!"  Indeed.  We backed up and I had a conversation with a 7.5 year old boy who had gotten separated from his mother and big brother.  Long story short, I got the information I needed in order to get help for him.  He was very brave, and my daughter was so concerned about him.  In all the busyness around us, it was A. who heard that child call out "Mom."  She was the one who came to his rescue.  She was the one who tried to help him feel at ease as she plunked herself on the pebbles in front of him, and looked him right in the eye.  When I asked if he would tell us his name, it was A. who encouraged him to let his guard down by chatting with him.  "I had a Tyler in my class last year."  And it was A. who was on high alert as we made our way for assistance.

And so, this week I was able to appreciate the help and kinship of strangers along with the deep caring and comforting traits my daughter possesses.

Here's a picture of the "black cat" (left side) that M. wanted to ride.

Wednesday, March 31, 2010

WDYD? Wednesday - Flashback Cereal

I don't recall eating a lot of sugary cereals when I was a kid.  I think we had Apple Jacks once in awhile, maybe Honeycomb on rare occasion, and possibly Tony the Tiger showed up with his Frosted Flakes a time or two.  Sure, I've consumed my share of the sugared junk on my own while I posing as an adult.  But now it's been many years since I've purchased anything like that, and it's rare I even purchase a cereal marketed by a big, national brand.  However, this does not mean that I don't love sugar.  Au contraire, mon frere!!  It is quite the opposite. I Love Sugar!!  LOVE.  SUGAR.  Too much.  So much so that when I was forced to do an elimination diet last summer to discover if I had food allergies, I realized how addicted to it I actually was.  Detox is not fun.

Fast forward to having put the kibosh on massive over indulgence of the sweet stuff.  Now I try to stick with just dark chocolate, and eliminate, avoid, limit my intake of straight up, nutritionally empty sugar products.  But.....But.....once in awhile I cave.  Come on ~ cotton candy?!  Cotton Candy, people!  Sugar and food dye on a stick.  My GOSH I love that stuff.  However, the more I learn about the harm too much sugar can do, the more hesitant I am to consume it (never mind the red #40 and blue #1 ~ how awful).  I do allow myself cotton candy once a year.

I think my favorite sugared cereals were ones that also incorporated chocolate.  How I'd dig and dig through a box of Count Chocula to devour those marshmallow bats (let us again acknowledge red #40, yellows #5&6, blue #1).  My dear roommate warned me during my entire search mission of the disappointment I'd experience when they were all gone.  Didn't listen ~ slow learner I guess, but I was driven.  Drat!  Must have bat!  The cereal alone was certainly no great shakes.

**Note that the box itself even beckons a taste of their "Spooky-Fun Marshmallows."  How was I to resist? 

Remember the chocolate milk you'd end up with at the bottom of your cereal bowl thanks to the chocolaty, sugary goodness flowing over the abnormally chiseled nuggets of hardened corn?  So good and gross all at once, it gives me a stomach ache just thinking about it.

I also loved Coca Krispies, but feeling the same way about all products vastly processed and of no redeeming value, these things just aren't part of my life anymore.  This is where I'd like to introduce you to EnviroKidz Organic cereal.  I broke down and purchased a box of the Koala Crisp, and it curbs the chocolate cereal fix, that's for sure!  It's a nice option for gluten free diets, and I like the fact that it has no preservatives or additives.  I've formed a new relationship with brown rice flour in my baking, and this is also the first ingredient in the cereal.
 
So as it stands, this week my WDYD? Wednesday consisted of treating myself to a taste of childhood.  I have selfishly hidden this cereal from the girls and plan to keep it all for myself.  It is with my bowl of chocolaty rice puffs and a mound of freshly sliced strawberries on top, I shall yearn no longer for both a sugar fix and a healthy dose of childhood memories.

Thursday, March 25, 2010

Stuffed Garland

Last night I got wind of this challenge.  It really was late, and I was Practically Spent, so I put it out of my mind.  But my subconscious sometimes knows me better than I do, and at 4pm today, an idea popped into my head.  Before I knew what hit me, I was in action.  I guess I just can't turn down a good challenge, especially where prizes are involved.  Here, then, is my Living With Lindsay $5 Challenge entry.

I made this garland for my daughter's bedroom window, but I have so many ideas about the fabric that could be used and where it could be hung, that it's an endless world of garland wonder.

It's a nice, little spring pick me up, and it cost me under $5, no problem.  Here are the supplies I used:

I had gotten the fabric as a remnant at Jo-Ann's a while back.  It was just a little strip, costing $.87.  I had the pins and scissors.  Although I used a rotary cutter to cut the strips, surely a scissors would have been just fine since it's not a super exact project.


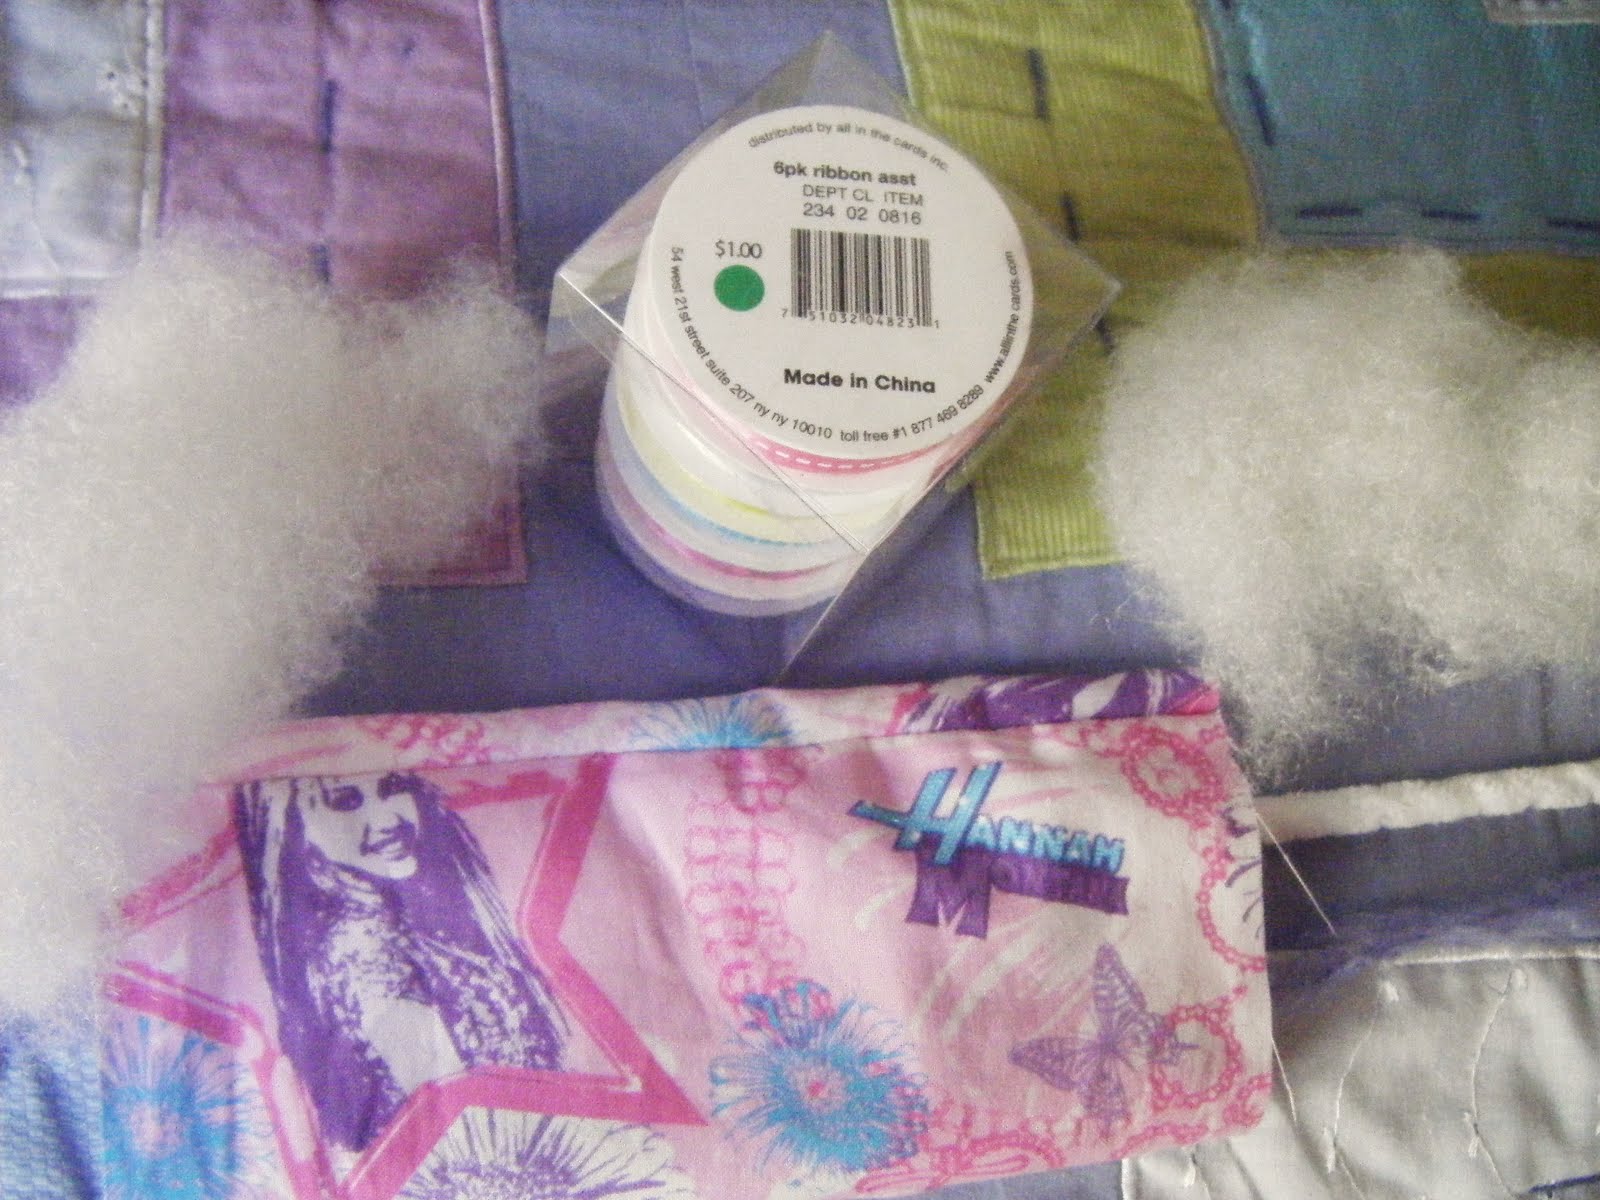
I also used a pack of ribbon from Target's dollar spot, but I had gotten it at 50% off.....probably after last Easter.  You can use any type of yarn, twine, string, ribbon to tie the garland balls to.  I used two colors of yarn.  The white I got from the Hospice Thrift Store for $.99, and the lavender was given to me in a bag full of unwanted craft leftovers from a friend.  You will also need some stuffing.  I had a bag of opened but barely used batting that I had gotten at a massive annual garage sale in my community last June ($.25).  But anything from tissue paper to cotton balls to Sunday newspaper ads will work.


You will be making fabric tubes, and you can choose any size you like, but I cut mine 4"x7".  I cut 6 of these 4"x7" strips in order to make a total of 12 tubes.


Next, put the right sides together.  Pin the long 7" sides, and sew these 7" sides only using a few back stitches at each end.


Trim the extra thread.  Now you have a tube that you will turn inside out so the right side is back on the outside where you can see it.


Lay your yarn out on a flat surface and pull your sewn tube at desired intervals of where you'd like them to hang, making sure to keep enough yarn at the ends for hanging.

In this picture you can see how one has already been fed on the yarn and stuffed, and the other is still just the tube of fabric.


Position your tube with the yarn now running through it with the seams on the top and bottom.

Next it's time to fill the tube.  What I did was put a bunch both above and below the yarn to help balance how it hung.  Again, keep your seams positioned on the top and bottom.  Get your fingers in there and bunch it around how ever you need to.

When you're done filling the tube, all you need to do is tie the ends with the ribbon of your choice.


I can envision this project in a laundry room done with fabric from a man's shirt, or in a kitchen with an old, red gingham table cloth.  It would be cute in a baby's room created from a fuzzy towel, or on a mantle made with any sort of fabric that fits your decor.

Having accepted this challenge, I can safely say that I came it on budget at a whopping $2.61.  The massive hug I got from A. and the gasp she gave as she looked up at the garland from her bed and said, "Ooooooo ~ I looooove it, Mom!  Thank you."......priceless.

LinkWithin

Related Posts with Thumbnails